Printing a Record
You can print a clean copy of a record, without the title and navigation bar. Any attachments can be downloaded and printed using the appropriate application.
The printed copy is configurable to include an agency logo in the heading on the left, right, or both. See Print Settings for more information.
If working in Dark mode, the report prints with a light background. It does not maintain the Dark mode appearance.
The printed record layout matches what is shown when viewing the detail record in Data Archive. Attached files print as they are shown in the detail record. They do not print as they appear in the downloaded file.
If a record includes Comments, optionally print the comment information by displaying the Comments panel on the record. If you do not want to include Comments, close the panel before printing.
To print a record:
Options vary depending on the print output selected from the Destination field. The following steps are an example of the process.
-
On the open record details page, click the Print
 button. The Print dialog opens.
 -
Select a print output from the Destination field. This could be a PDF, a printer name, etc.
-
Enter the pages to print in the Pages field.
-
Select either Portrait or Landscape from the Layout field.
-
Select Color or Black and White from the Color field.
-
Click More Options to expand the Options controls to adjust the addtional optional fields.
-
Choose a paper size from the Paper size field.
-
Select a number from the Pages per sheet field.
-
Select Default, Custom, Minimum, or None from the Margins field. If selecting Custom, the Print Preview pane displays the margin rulers. Drag the rulers to the preferred margin spacing.
-
Select Print Quality from the list.
-
Select Default or Custom from the Scale list. If selecting Custom, the scale selction displays. Click the up or down arrows or type the scale number into the box.
-
Select or clear the Print on both sides check box. If selected, choose Flip on long edge or Flip on short edge from the list.
-
Select or clear the Headers and Footers check box. URL visibility is controlled in the browser settings. For example, you may see the URL if using Firefox, but not if using Microsoft Edge. Clear this option to remove the URL and the page header and footer.
-
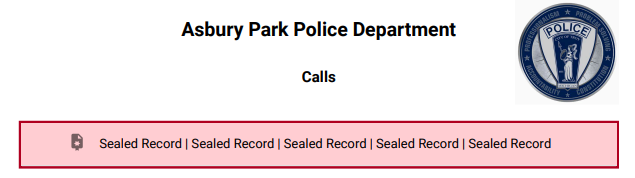
Select or clear the Background graphics check box. If selected, any background graphics on the page print. For example, if printing a sealed record, a banner prints on the first page. To optionally include background color treatment for the Sealed Record banner, use More settings from the print dialog to choose background option (print backgrounds or background graphics depending on the browser used).
Below is an example of a report with the Background option selected.
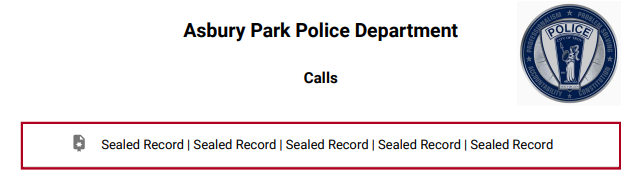
Below is an example of a report with the Background option cleared.
-
Click the Print button.
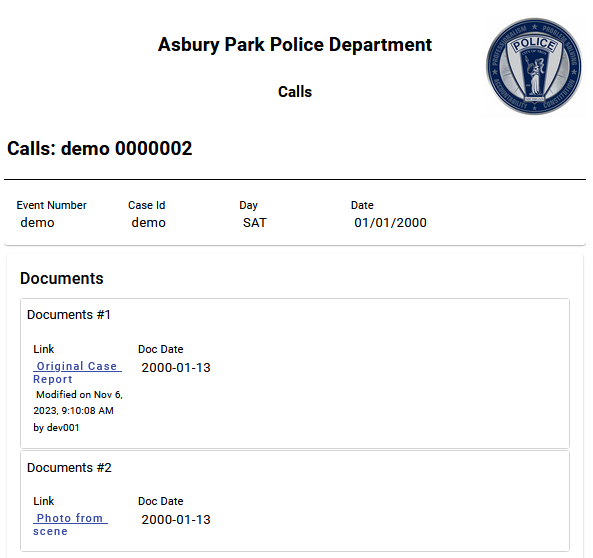
Below is an example of a printed document: